What’s On the Menu

Cream of Asparagus Soup

Are you feeling lucky? Seems kinda hard to these days. With everything being so topsy-turvy, the places that are temporarily shutting down, and all this social distancing, hunkering down is about all we’re left with. The stores are slowly starting to restock things in my neck of the woods, and for that I’m grateful. I noticed today: asparagus was on sale. Woohoo!

Asparagus is a great source of fiber, folate, and vitamins A, C, E, & K.
It’s low in fat and calories, and It can help with regulating blood sugar.

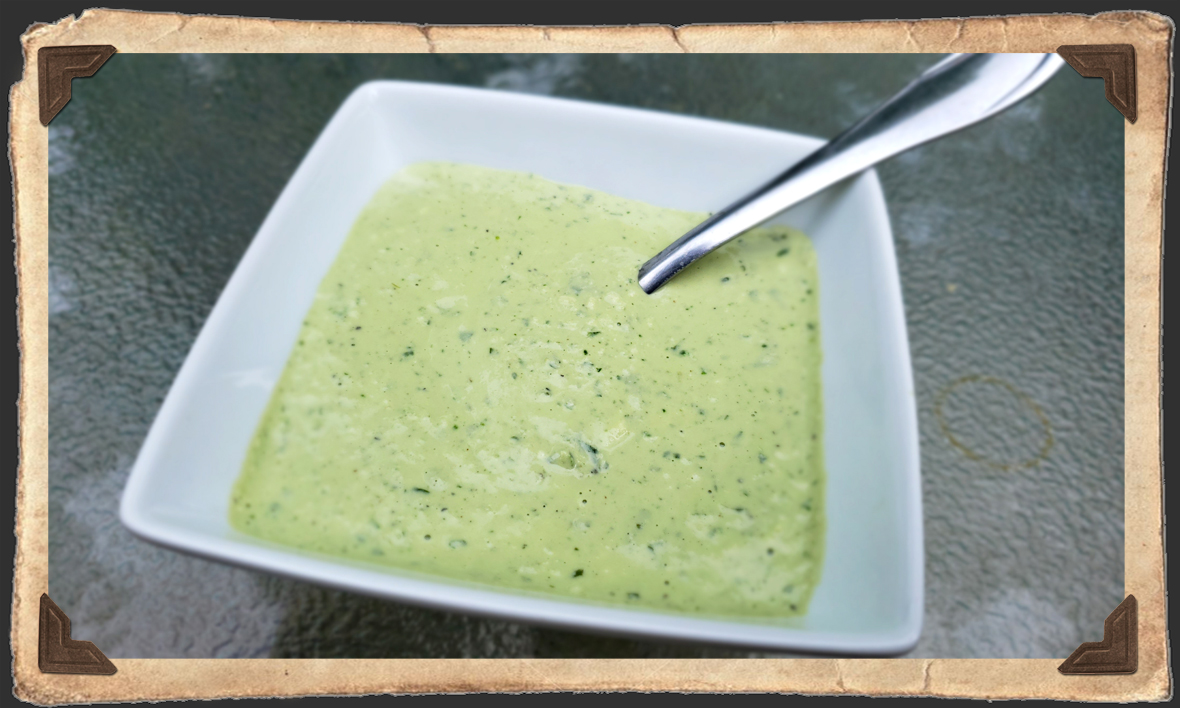
Since tomorrow is St. Patty’s Day, it seemed very appropriate to hunker down with some delicious and bright green asparagus soup. You can avoid the crowds and avoid getting pinched!


Cream of Asparagus Soup

  • 2 tablespoons butter
  • 2 cloves of garlic, minced
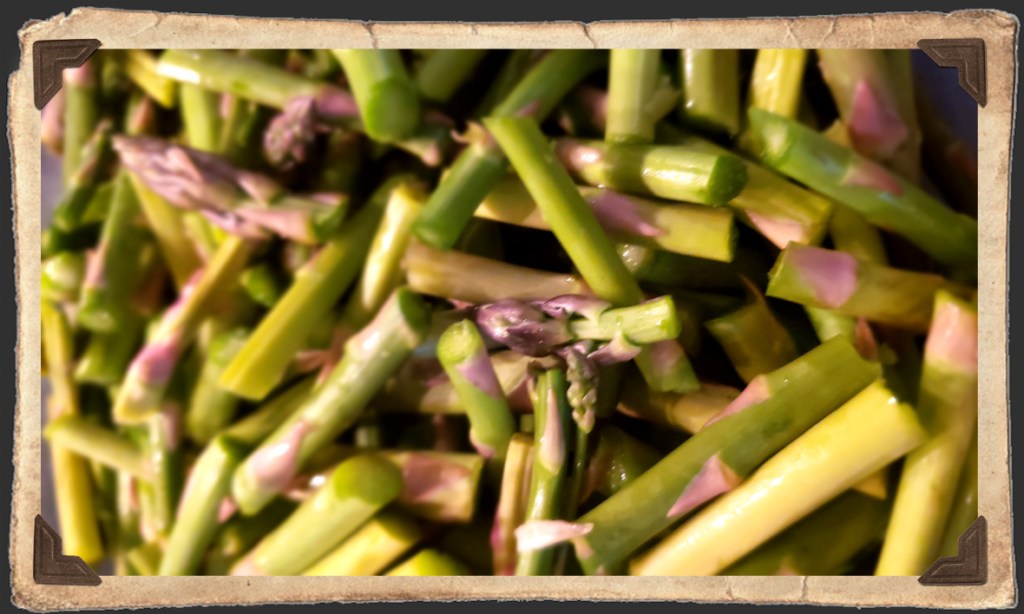
  • 2 pounds asparagus, divided 1½ and ½
  • 2 cups chicken broth
  • salt & pepper, to taste
  • ½ cup heavy cream
  • ½ cup shredded Parmesan cheese, plus more for garnish
  • ¼ cup white wine
  • 2 tablespoons olive oil
  • 13 oz turkey kielbasa
  • ½ medium butternut squash, peeled and cut into 1″ cubes
  • 1 cup carrots, chopped into ½” pieces
  • ¼ cup almond slivers, toasted

In a medium-sized pot over medium heat, melt butter. Add garlic and cook for about 1 minute. Trim tough ends off 1½ pounds of the asparagus and cut into 1 inch pieces. Do the same for the remaining ½ pound of asparagus, but set those pieces aside separately.

Fun Fact: Asparagus contains asparagusic acid, which is a sulfur-containing compound that, when broken down in your body, creates that “strange smell” later on in the bathroom.

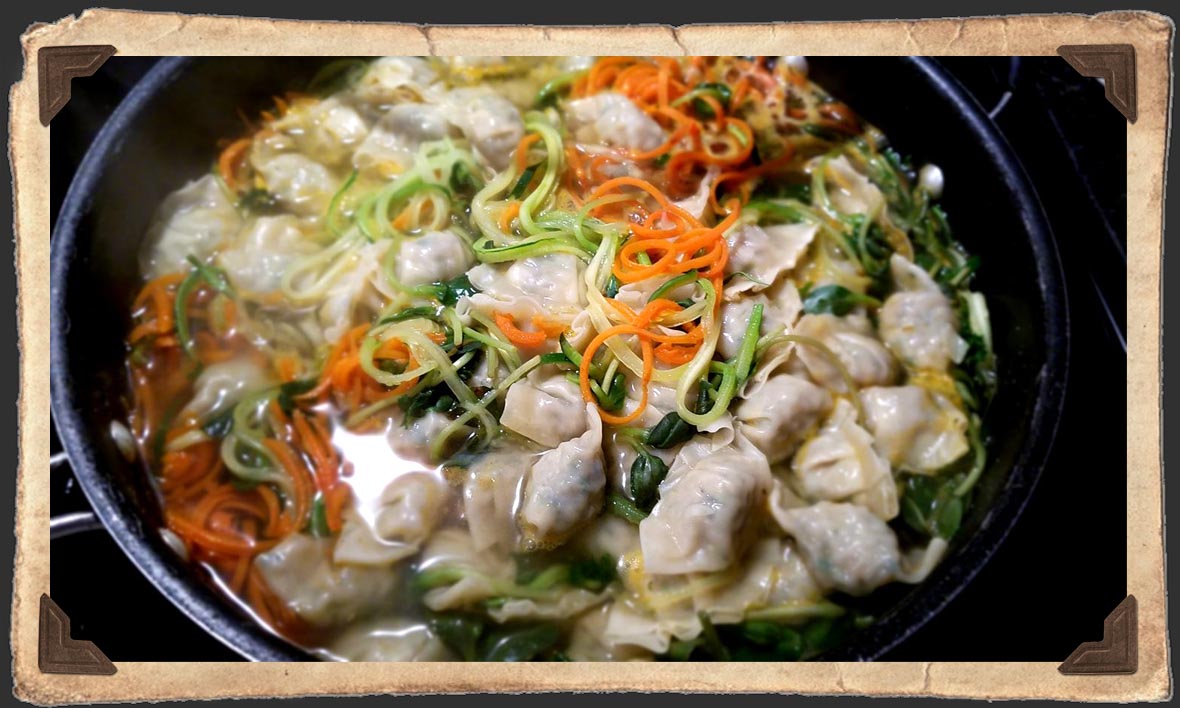
Add the 1½ pounds of asparagus to the pot and season with salt and pepper. Cook for about 5 minutes or until it gets a slightly golden color. Add broth and simmer until asparagus is tender but still bright green, about 10 to 15 minutes.

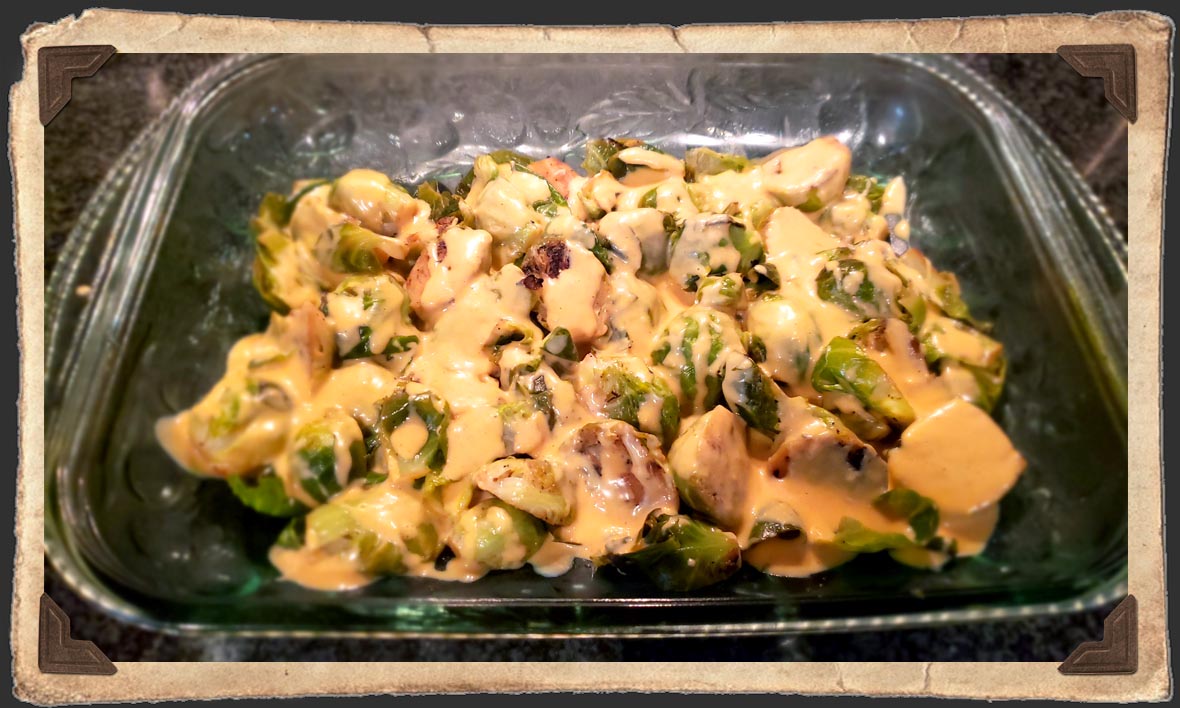
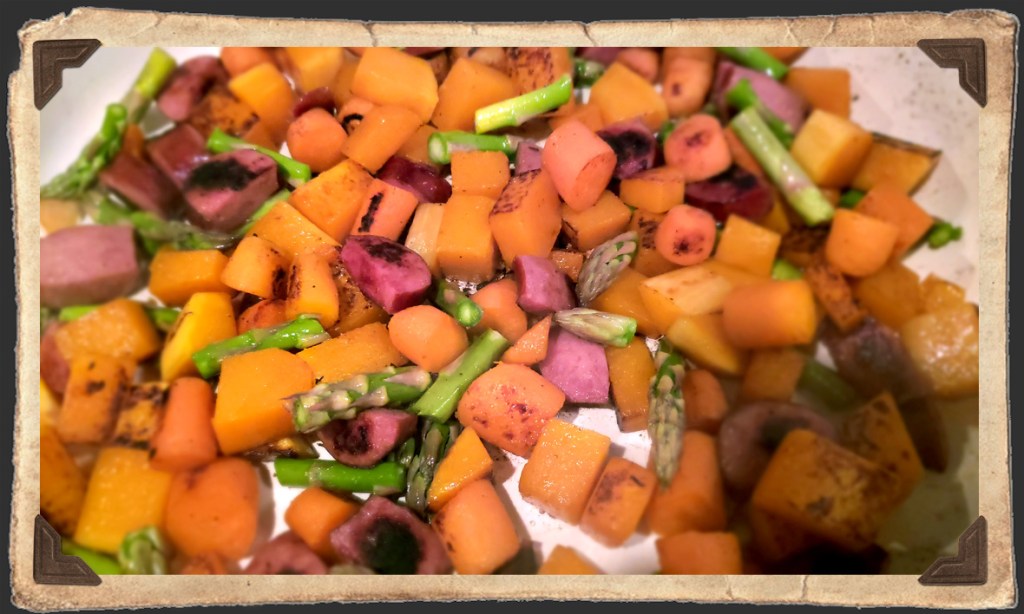
While soup is simmering, put almond slivers in toaster oven and toast until golden. Set aside. Add olive oil, carrots, and butternut squash to a large saute pan. Cook on medium-high until they are lightly browned and tender, tossing every few minutes to cook each side. Slice kielbasa length-wise, then cut into ½” half-moons. Add to pan and continue to cook veggies and kielbasa together, tossing occasionally, until you get a hard sear on most sides. At the last few minutes, add in the last ½ pound of the cut asparagus pieces to pan and toss until slightly tender.

Pour asparagus mixture into a blender and set aside. Meanwhile, add cream and Parmesan cheese to pot and heat on medium-low until cheese is well-blended. Add white wine and continue to heat until entire mixture is warmed through. Season with salt and pepper, as desired.

Place top on your blender and cover it with a towel in the event pressure builds up from the warm liquid inside. (It might cause it to splatter from the lid.) Blend mixture in 30-second spurts to ensure that you don’t overheat the asparagus. Continue to do this until the mixture is smooth, about 1-2 minutes worth.

Did you know?

The color of Saint Patrick’s Day was originally blue!
The switch to green probably happened because of Ireland’s
nickname “Emerald Isle,” the green in the Irish flag, and the shamrock. 🍀

Pour asparagus mixture back into pot and stir to combine with cream. Heat on medium-low until warmed through.

Serve soup in a shallow bowl. (I put mine in a prettier deeper bowl for the picture, but it didn’t showcase as well.) Spoon in veggies and kielbasa mixture. Top with shredded Parmesan cheese and toasted almond slivers.


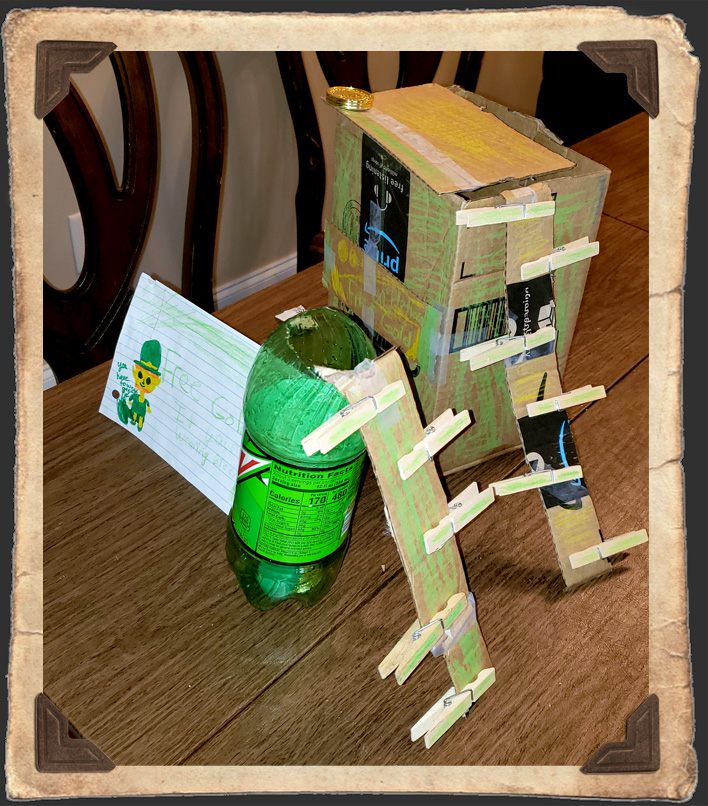
As we speak, my daughter is making Leprechaun traps to put all around my house. I cannot begin to tell you how excited I am about that. *groan* At least she’s keeping herself entertained, being creative!

Stay healthy and sane out there. We will get through this soon enough. In the meantime, enjoy your soup and I hope you snag some good luck from all of those Leprechauns! 🍀

Meatless Monday Lentil Loaf

Ahh, the New Year.  A time for restarting, redefining, and of course resolutions!  This is the time when most people declare that they are going to start eating healthier, exercising, and getting more sleep with less phone time.  But now that we’re nearly half-way through January already, that resolve tends to fade. 

Statistics show that by the 2nd week of January, nearly 25% of people have abandoned their New Year’s Resolutions.

Lentils are amazing little things. They’re high in fiber, complex carbs (the good kind of carb!), and are an excellent source of protein, making them a great gluten-free meat alternative.

Don’t become a statistic! Stay engaged and on track by trying new things and keeping your menu interesting! Among the many popular New Year’s diets, Meatless Mondays is super common. Years ago, I jumped on the bandwagon and tried making a Lentil Loaf. I failed miserably. I was unfamiliar with lentils at the time, and new at making vegetarian dishes. I’ve been determined to come up with a better way, so I have been working diligently on a new and improved lentil loaf recipe. And when I say diligently, I mean I have made 3 of these in the past 3 days. Diligently, I tell you! And eureka, I think I’ve finally done it!

Compared to white rice, quinoa has substantially fewer calories and carbs and about twice the amount of protein. A great addition to any dish!

One challenge of the lentil loaf is getting it to stick together. Most recipes call for rice as a binding agent, but one of my resolutions is to avoid pasta and other carb-heavy foods for a while, so I turned to my favorite rice alternative: quinoa. Does it do as great a job at binding? Honestly, no. But the health benefits alone are worth a little crumble, in my opinion. Plus, it tastes great. I tried various low- and no-carb ways of binding, including chia seed “gel,” cooking the lentils in more liquid and for longer, even in a water bath. The chia taste was off-putting and overall the consistency of all those loaves came out super mushy. I suppose I could have just kept on baking them, but who wants to bake dinner for 2+ hours? Not me!

So after all that, I’m sticking with my original recipe. It does not hold together like a true meatloaf, but the lentil, pepper, and onion taste and texture make up for that. My husband, daughter, and I could barely stop eating it. And without those bulky carbs, we weren’t stuffed. I hope you enjoy this new and improved lentil loaf recipe as much as we do!

Here’s to keeping up those resolutions!


Meatless Monday Lentil Loaf

  • 1 cup dried lentils, rinsed (I used tri-color lentils)
  • ½ cup quinoa, rinsed
  • 3 cups chicken broth, separated 1 & 2
  • ½ cup green pepper, diced
  • ½ cup red onion, diced
  • 1 Tbsp Worcestershire sauce
  • 1 Tbsp BBQ sauce (see recipe below)
  • 1 tsp parsley
  • 1 egg
  • dash salt & pepper
  • dash onion & garlic powders

Bring 2 cups of chicken broth to a boil and add lentils. In a separate pot, bring 1 cup chicken broth to a boil and add quinoa. Simmer both until tender, about 35-45 minutes. Reduce heat as liquid is absorbed and stir frequently to avoid scalding on the bottom of the pot. Lentils should be mostly soft and quinoa should not have any crunch left. If all liquid is gone before this happens, add a very small amount of water to continue cooking until you’ve reached the desired consistency.

While lentils and quinoa are cooking, dice your peppers and onions, then prepare your BBQ sauce.

BBQ Sauce

  • 1 cup ketchup
  • 2 Tbsp red wine vinegar
  • 2 Tbsp smoked paprika
  • 2 Tbsp Worcestershire sauce
  • 1 Tbsp agave (or brown sugar)
  • dash salt & pepper
  • dash onion & garlic powders

Combine all ingredients together and wisk until smooth. Adjust to taste as needed. Set aside.

Preheat oven to 350°.

Once cooked, combine lentils, quinoa, green pepper, red onion, Worcestershire sauce, parsley, egg, and seasonings in a large mixing bowl. Add 1 tablespoon of the BBQ sauce. Mix thoroughly.

Pour into a loaf pan and top with enough BBQ sauce to create a thick layer. Any leftover BBQ sauce can be used for dipping later.

Bake at 350° for 60-70 minutes. Loaf should look firm, edges slightly browned, and toothpick should come out clean. Allow to cool for 15-20 minutes before slicing.

I served the lentil loaf on top of a bed of wilted arugula along with a side of my Sweet & Spicy Roasted Cauliflower. It was a hearty and satisfying meal, and I was able to stick to my New Year’s goals!

Welcome to 2020!

Happy New Year to all of my favorite foodies!  I hope everyone had a wonderful Christmas and a great time ringing in this new decade.  I, for one, am looking forward to a new year of possibilities, opportunities, and amazing food!

In 2019, I took a brief hiatus from blogging to get some ducks in a row.  The Saucy Tomato has been around for 3 years now and it’s time for some Spring, er, Winter cleaning, reorganizing, and revamping.  There are some exciting things on 2020’s horizon that I wanted to share with you…

First and foremost, 🍤NEW RECIPES!🍤  I’ve had a revelation: I’m no Ree Drummond or Giada.  I can’t whip up a new recipe every week to keep you ever on your toes, constantly intrigued.  I’m a Real Life person.  Things come up and life gets in the way.  So I’ve revised my own expectations and I think they’ll line up with yours better, too.  My goal is one fabulous new recipe each month.  I feel like that is doable for all of us.  After all, who has time to cook an entirely new recipe every single week?  Not this girl!

📸NEW PHOTO SPACE!📸  My home, while beautiful to me, is not ideal for crisp, clear food photos.  So I propositioned a friend about using HER home, with its excellent lighting and newer finishes, and we’ve come to an agreement:  I will cook food for my pics at her house while she’s at work and she gets to come home to dinner already made!  We are both so excited about this! 

🔴NEW PINTEREST PAGE!🔴  Saucy is finally on Pinterest!  I’m still learning the ropes, but under the tutelage of a fellow blogger friend, I brainstormed on some successful pin ideas and started the process. It’s a scantily clad page at the moment as I get my bearings, but you’re welcome to check it out if you like. I promise you’ll be sorely disappointed, haha!  Stay tuned for an official “Launch Party” announcement when the page has shaped up more.

📝RECIPE REVISING!📝  I will be revisiting some of my favorites older recipes and revising them to accommodate needed or wanted changes.  Once a month or so, I will repost these updated versions. What does this mean for you?  You are getting the best of the best from my archives this year!

👍FACEBOOK FUN!👍  Saucy will continue with its usual Facebook banter that we’ve grown to love, including (but not limited to) the Monday Munchies, TIPsy Tuesday, the Not-So-Grocery-List, and Food for Thought.  (There is also a link to these on my blog, under The Snack Pack.) 

💞MAYBE SOME INCENTIVES…?💞  I had an idea rolling around in my head for some incentives.  Something like: if you refer X number of friends who end up following me on FB, Pinterest, or sign up with the blog site, I will reward you with a “secret” recipe that no one else is privy to.  I mean, that’s pretty cool, right?  We shall see.  It’s still a thought in process…

Just reading all of this makes me smile.  I love the feeling of fresh starts that a new year brings.  Thanks for still being here.  Cheers to a deliciously fun 2020! 🥂

Arugula Pesto

Hopefully by now you’ve tried the Creamy Cashew Pesto that I featured a few weeks ago. If not, I can’t highly recommend enough because it really is just that good! To my point, I recently received accolades from a Follower. Her words made me smile ear to ear and I wanted to share them with you:

This Follower and I began chatting a bit and we collaborated on an arugula version of my pesto. Basically, the same recipe, but with arugula instead of basil. So today I gave it a whirl. It was excellent – bright and fresh, with a nice bite to it! The arugula adds its signature peppery profile and will work well for those who like things on the spicier side.

To tone it down, you can add more cashew cream, olive oil, and/or Parmesan. This smooths out the heat and made it more comparable to the original recipe. I added just a little of all three, plus a splash of lemon juice, until I achieved my personal desired flavor.

The best part of cooking is the experimenting! Have some fun and let me know how your recipes come out!

Homemade Ranch Dressing

So yesterday I made my own Ranch dressing. I’m sort of embarrassed to admit that I have never done this before. It seems like such a basic foodie thing to do — make your own Ranch. But I’m more of a vinaigrette kind of girl, which you can check out here, so this was indeed a first for me.

The biggest difference between my dressing and others is that instead of mayo, sour cream, and buttermilk (roughly 540 calories for half a cup of a typical recipe), I use nothing but Greek yogurt and a little whole milk for thinning (about 100 calories for that same half of a cup). Fewer calories, less fat, and a boost of protein = YES.

Making it was super easy, and I totally winged it (wung it? wang it? Fun with words, LOL.) What does that mean? I didn’t measure anything. I just dumped how much I wanted into a bowl and seasoned it ’til it tasted right. I encourage the same for you. But, if you’re jonesing for some real measurements, I’ll do my best to accommodate…


Homemade Ranch Dressing

  • ½ cup Greek yogurt
  • 2-4 tablespoons whole milk, depending on desired consistency
  • ½ teaspoon each of: onion powder, garlic powder, salt, pepper
  • 1 tablespoon each of: freshly chopped parsley and chives
  • 1-3 tablespoons lemon juice, preferably fresh

Whisk together yogurt, milk, and spices until smooth. Add lemon juice and and whisk again. Tweak as needed to gain desired flavor and consistency.


I put this on a salad made of arugula, grilled chicken, turkey bacon, and red and green peppers. So amazing. I also used some with dinner for dipping jalapeño poppers. The first thing The Man said was “It’s definitely Ranch flavored, but it’s not as heavy.” Bingo! Mission accomplished.

Penne with Creamy Cashew Pesto

Sometimes you just want to do something different. Special. Over the top. I can’t think of a better time to do that than on Mother’s Day! I mean, really. The woman wiped your butt. I’d say she deserves a bouquet and a whole lot more! A wonderful friend of mine at Judy’s Wellness Café recently introduced me to cashew milk. (plug plug, great site) We started talking about different things you could do with it, and that’s when it hit me: cashew pesto. My wheels started turning and the next thing you know, I was whipping up something I’d never tried before: a fresh and vibrant pesto made with cashew cream rather than pine nuts. I knew immediately that this would make for a really nice Mother’s Day lunch!

Cashew milk on it’s own is pretty easy to make. It doesn’t require all the extra straining that almond milk does. It DOES, however, require a minimum of 4 hours prep time for soaking, so bear that in mind if you decide to make this. Easiest thing to do is soak the cashews overnight, that way they’re all ready for the next day. It’s worth the wait, because cashew milk has a pretty impressive repertoire. As a general rule, you use a 3-to-1 water-to-cashew ratio. From there, make it into a smoothie with fruit, add more water and use as a creamer in your coffee or tea, or use less water and make a cream for sauces and the like. And that’s where my idea was born…


Penne with Creamy Cashew Pesto

First, prepare your cashews. You will need raw cashews that have not been roasted or salted. Soak them in water, enough to cover them, for at least 4 hours. The cashews will swell a little and get softer. Drain and rinse, and get ready to make some yum.

For this recipe, I soaked and drained 1 cup of cashews and then blended them with 1 cup of water. You will have leftover cream that you can save for something else!

  • 2 cups basil, torn
  • ½ cup cashew cream
  • ½ cup Parmesan, shredded
  • 2-3 cloves garlic
  • ¼ cup olive oil
  • 2 teaspoons white wine
  • 2-3 chicken breasts
  • whole wheat penne pasta
  • salt & pepper, to taste
  • extra basil for garnish

Go ahead and season your chicken breasts and get them on the grill. Flip as you go along, cooking them thoroughly. Try to get some pretty grill marks on them, too. Go ahead and show off for Mom.

While your chicken is cooking, bring a pot of water to boil. Don’t forget to salt the water so your pasta isn’t bland. Meanwhile, once your cashew cream is ready, combine it in a blender or food processor with the basil, Parmesan, garlic, olive oil, white wine, salt and pepper. Blend until smooth, tweaking as needed.

As if you needed another reason:

Cashews have been shown to reduce blood pressure
and raise “good” cholesterol levels.

Cook the penne al dente. It’s really the only acceptable way, plus it’s fun to say.

Check on your pesto. It may have thickened up a little. If so, add a touch more olive oil and blend. Once your pasta is ready, drain it and toss it with the pesto sauce. Serve with sliced chicken, garnish with Parm and basil, and voilà! Lunch is served!

Food so good you could slap yo’ mama. But you better not! It’s Mother’s Day, after all!

For more cashew and cashew milk info and tips, CLICK HERE!

Italian Stuffed Peppers on Cinco de Mayo?

As you are probably well aware by now, Sunday is May 5th, better known as Cinco de Mayo. Time for a fiesta!! 🎉 While it’s reportedly a minor holiday in Mexico, here in the U.S., Mexcian restaurants are going to make a KILLING this weekend! So naturally, I wanted to post a really good Mexican-style recipe.

And that’s when I realized I didn’t exactly have many, LOL. What a fiesta fail! I know a few festive items that I make on the regular at my house: tacos, chips and salsa, guacamole, and stuffed peppers. But all of those seem so typical, so I thought I might mix it up a little for ya. Let’s live on the edge! How about Italian Stuffed Peppers on Cinco de Mayo?


Italian Stuffed Peppers

  • 4 medium red peppers
  • 1 tablespoon olive oil
  • 1 small red onion, diced
  • 1 pound ground turkey
  • 2-3 roma tomatoes, diced
  • 1 cup kale leaves, finely chopped (optional)
  • basil, oregano, garlic, salt, pepper, all to taste
  • dash of red pepper flakes (optional)
  • ¼ cup grated Parmesan cheese
  • 1 cup shredded Mozzarella cheese
  • 1 cup brown rice

Go ahead and get your rice going. Rice takes forever. Brown rice is even worse, but I think the flavor is better for this, plus it’s healthier.

Preheat oven to 400°. Cut off the top of your peppers and keep it beside the pepper you cut it from. You’ll need to match them back up later. Clean out the peppers and set them aside.

In a sauce pan, sauté the red onion in olive oil until translucent. Add ground turkey, tomatoes, kale, and seasonings. Cook thoroughly, then stir in the Parmesan and the rice and stir until fully blended. Fill your peppers about ¾ full with the turkey mixture, then top with Mozzarella cheese. I like to add a little extra sprinkle of salt, basil, and oregano on top of the cheese as well.

Cover the peppers with their matching tops and place in a baking dish just big enough to keep them standing upright. Bake for about 30 minutes, or until peppers are tender. You can serve these with black beans or rice or just eat them by themselves. So, so good!

If that is just not cutting it for you, and you really want something more Mexican-like, then take a look at this oldie but goodie:

CHICKEN TORTILLA SOUP


Or, for a snack with a Mexican twist, try adding cilantro leaves to your apple slices. It’s pretty tasty!


No matter what you decide to do, have a great time this weekend, and have a margarita for me! 🍹

Ginger Glazed Carrots

Just in time for Easter this Sunday, I’ve got a tasty little recipe for glazed carrots. Cuz ya know … Easter. Bunny. Carrots. HA! 🐰 It’s just a little something I whipped up one day for a family lunch that has turned out to be a big hit. My husband said it reminded him of a dish his grandma used to make, and he and my mother-in-law raved. Those were quite the compliments.


Ginger Glazed Carrots

  • 1 pound of carrots
  • ⅓ cup agave, maple syrup, or simple syrup
  • ¼ cup relish
  • 1 teaspoon fresh grated ginger
  • 2 teaspoons red wine vinegar
  • salt & pepper to taste

Wash, peel, and slice carrots. I like to cut mine on the bias. I think it looks prettier that way, but you can slice them any way you like. In just enough water to cover the carrots, simmer until they are cooked but still somewhat firm. Drain the water thoroughly, then add all of the remaining ingredients. Simmer until the sauce reduces, about 15-20 minutes.

Wishing you all a wonderful Easter, full of family and fun and most importantly, time to ponder and be thankful that Jesus rose on that 3rd day. 💗

3-2-1 Cake

You’ve been so good and you’ve eaten all your green veggies, right? 😉 Time for a little reward! My dad was the one who showed me how to make 3-2-1 Cakes a few years ago and they have been a staple in our house ever since. Super easy, fun for kids, and the perfectly sized little cake, just for you!


3-2-1 Cake

  • 1 box angel food cake mix
  • 1 box regular cake mix (any flavor you like!)
  • milk
  • toppings

In a large plastic container or bag, pour in the entire box of angel food cake and regular cake mixes. Shake together until fully blended. You can now store this for multiple uses. I like using a gallon sized plastic bag, because I can flatten it out or roll it up to save space in my pantry.

In a mug or ramekin or small bowl, add 3 tablespoons of the cake mix and 2 tablespoons of milk, stirring until fully blended. Microwave for 1 minute. (Hence the 3-2-1.)

Top with whatever you like – my favs are fresh fruit, chocolate syrup, and whipped cream.

Happy Weekend!

Brussels Sprouts? Yes, Brussels Sprouts.

Can you believe it’s already the last day of March? What better day to share a final post on another of my favorite green veggies! (Not that we won’t still enjoy our greens throughout the rest of the year!)

Brussels sprouts are cute little mini cabbage kinda things that get a bad rap in the home cook’s veggie world. I think it’s because most often they’re boiled, which just makes them mushy. No thanks. But they’re soooo good for you, I didn’t want to give up. So I tried pan searing them instead. That’s when I fell in love! So. Much. Better. I’ve since cooked Brussels sprouts for family and friends who were skeptics and they all raved. Even my 8-year-old loves them, and that’s really saying something!

I love turning something healthy into something delicious!


Brussels sprouts are a low-calorie veggie that’s high in many nutrients, especially vitamins K & C, plus have an impressive antioxidant content. Bonus: half a cup will meet up to 8% of your daily fiber needs!

Pan Seared Brussels Sprouts

  • 1 pound Brussels sprouts
  • 1 tablespoon olive oil
  • 1 tablespoon lemon juice
  • water
  • salt/pepper/onion & garlic powders, to taste

Add your olive oil and seasonings to your pan, coating entire bottom of pan. Cut off the ends of the Brussels sprouts, then half the sprouts length-wise. Place them flat side down into pan. (Some of the leaves will come off — just throw them in the pan, too.) Sauté on medium-high until the bottom gets a nice sear on them, then add water – enough to cover the bottom of the pan. Cover and simmer for about 10-15 minutes, adding more water if necessary, until the sprouts are tender.

Serves 4 people

Why is it spelled that way?

Brussels sprouts reportedly first appeared in northern Europe during the fifth century. They were later cultivated in the 13th century near Brussels, which is how they got their name.

Brussels Au Gratin

Serves 4

  • 1 pound Brussels sprouts, prepared as directed above

Once your Brussels sprouts are done, place them in a baking dish just large enough to spread them evenly across the bottom. Spoon enough cheese sauce over them so that each one is coated and there is some covering the bottom of the baking dish. Top with the au gratin topping and broil on low until golden brown.

for Smoked Paprika Cheese Sauce

  • 2 tablespoons butter
  • 2 tablespoons flour
  • 1/2 cup Parmesan cheese, give or take
  • 2 cups milk, give or take
  • 1-2 tablespoons smoked paprika, to taste
  • salt & pepper, to taste

Notice the “give or take” and “to taste” references. I find making any sauce is not an exact science. It’s more a matter of finding the perfect flavor and consistency for what you plan to do with it. For a cheese sauce, it also depends on the kind of cheese you use. Parmesan is less creamy and has a stronger flavor, so you’ve got to find what works for you. Parm also melts more slowly, so take your time adding it in. If you add too much or turn the heat up too high in a rush to melt the cheese, you risk singeing or having your sauce separate.

Never trust a cook who doesn’t lick her fingers.

Once I get my flour and butter whisked together, I start slowly adding in the milk and cheese until it looks the way I want it. It should be thick enough to coat your fingertip without being stringy from the cheese or so loose it runs down your finger.

Add as much or as little of the smoked paprika along the way or at the end until it tastes like you want it to taste. It always surprises me how much smoked paprika I end up using. As potent as it seems, it easily gets lost if you don’t add enough. I recommend going until you think it tastes great, then adding just a little more.

It takes just as much time and effort to make a little cheese sauce as it does to make a lot, plus I think making too little is actually trickier because you start with such a small amount of roux. So add a lot or a little of this sauce to your final product, and save any leftovers for another night. It would be great on chicken or pork, mixed in rice or quinoa, added to eggs or sautéed veggies, etc.

Au gratin originated in French cuisine.

It means to have a golden crust on top.

for Au Gratin Topping

  • ½ stick butter, melted
  • 1 cups Panko
  • 1 tablespoon grated Parmesan
  • 1 tablespoon parsley, finely chopped

Combine all ingredients and mix until even coated with butter.

Focusing on all these green veggies has been so much fun! I feel like we did them proud. 💚

Looking forward to some amazing April recipes next month!

Sunny Sunflower Sprouts

St. Patty’s Day has come and gone, but we’re still celebrating our green veggies here at Saucy. There are just so many great ones to choose from! Today I wanted to highlight another one that’s a little lesser known: Sunflower Sprouts. You can usually find these at your local farmer’s market or at a natural foods store. They can be a bit pricey, so I recommend shopping around for the best deal because once you try them, you’re gonna’ be hooked.

A sunflower sprout is just that — it’s the very first sprout of a sunflower from its seed. Once they get big enough, they are cut from the seed or pulled along with the seed. I don’t mind the seed casings in mine, but The Man does not like them in his. If you get a batch with seed casings, you can usually put them in a colander and kind of shake them free to separate them from the sprout itself.

The first question people usually ask me is, “What do they taste like?” The best description I have come up with is that they taste a bit carrot-like. They’re slightly sweet with a nice earthy flavor to back them up.

Sunflower Sprouts are rich in stress-fighting Vitamin B & antioxidant-packed Vitamin E.

The next question I’m usually asked is how I cook them. My first response is that I often don’t! Because of their sweet carroty nature, they make a great raw snack. They have a smooth texture, so they’re good by themselves or added to a salad. Plus, eating them raw keeps them fresh and intact, helping you reap all of their nutritional rewards.

When Sunflower Sprouts are cooked, they behave similarly to spinach. You can have a massive pile and once it’s wilted down, you wonder where it all went! Bear that in mind when making my next favorite way to cook sprouts: a simple sauté with a little olive oil, lemon juice, salt, and pepper. It makes a great side or base for layering different flavors.


Sunflower Sprouts provide a whopping 25% protein which helps rebuild muscle and they’re high in hormone-balancing zinc.

And then there’s stir fry. Throw all your favorite veggies in a sauté pan or wok, starting with those that take the longest to cook and then adding the quicker cooking items — like sprouts — at the end. My latest quick weeknight stir fry was super easy and consisted of just chicken, red peppers, scallions, mung bean sprouts, and sunflower sprouts. I made a sauce by mixing to taste oyster sauce, soy sauce, red wine vinegar, S&P, garlic, onion, and ginger powders, and olive oil.


Once you get the hang of cooking sprouts, you can also step out on a limb and get creative! I found some mini chicken wontons and created a Chicken Wonton Soup with zucchini and carrot noodles, sunflower spouts, and fresh parsley and ginger in chicken broth. It was pretty darn amazing.

Sunflower sprouts are just some of the out-of-the-box deliciousness that’s in season this Spring. Now that the weather is getting warmer, I encourage you to venture out to your fresh markets and try something different. You might just discover a new favorite!


Oodles of Zoodles

In the world of healthy eating, zucchini noodles have been all the rage for some time now. Maybe you’ve tried them, maybe you haven’t, but this is one veggie craze that is well-deserving of its fanfare.

Zucchini by itself probably doesn’t seem all that exciting. But consider this: it’s fat-free, packed with vitamins, and full of water and fiber. One zucchini has more potassium than a banana (wow!) and it has anti-inflammatory and antioxidant qualities.

Here’s something I didn’t know:

Botanically, zucchini is a fruit!


Sheer craziness.

Zucchini has a nice mild flavor, so it can easily be transformed or combined with stronger flavored ingredients, and since it’s not so heavy, you can pile it on your plate guilt-free.

Anyway, back to the zoodles. Similar to spaghetti squash, you can use zoodles in place of pastas, create stir frys, or serve as a side. The overall process couldn’t be easier. Select a medium to large zucchini. Spiralize. Done.


The easiest way to make zucchini noodles is with a spiralizer. I have a Hamilton Beach Spiralizer/Food Processor that I use pretty regularly. I highly recommend the moderate investment. Of course, there are much simpler (read: less expensive) versions out there. Just make sure you read the reviews. One bad experience can send your dinner plans spiraling out of control! (See what I did there??)

NOT READY TO COMMIT?
No Problem.
YOU CAN FIND PRECUT
ZOODLES IN MANY PRODUCE
SECTIONS NOW, TOO.

While this seems like a very simple concept, it only takes one hot second to overcook your zoodles and turn them into pure liquid. Like, they just disappear. I’ve learned the hard way to add them in at the very last minute, quite literally. The longer they stay in the heat, the softer they will get. My latest trick has been the easiest: microwave them lightly covered for about 3-5 minutes. They are hot, but still somewhat al dente, and ready to serve.


Parmesan Zucchini Noodles

  • 2 medium/large zucchinis
  • 1-2 tablespoons butter, diced
  • 1/4 cup grated Parmesan cheese per zucchini, or to taste
  • salt & pepper

Spiralize your zucchini and put them in a microwave safe bowl. (You may want to cut your zoodles a little, as they are pretty long and can be tricky to serve.) Add the diced butter, spacing it evenly on top of the zoodles. Sprinkle the cheese evenly on top. Cover lightly and microwave for 3-5 minutes, depending on amount of zucchini. Gently mix ingredients until butter and cheese are combined – creating a sauce of sorts – and thoroughly coat the zoodles. Add salt and pepper to taste. This will give you a simple side dish for about 2-3 people.


🍀 Feeling Lucky? 🍀

Got the hang of it? Wanna get a little fancy?? I’ve made this next side dish 3 different times for 3 different people and they all RAVED. I served it with chicken, but I bet it would go well with some corned beef this Sunday, too.


Zoodles with Summer Fresh Alfredo

  • 3-4 medium/large zucchinis, spiralized
  • 2 medium vine ripe tomatoes, diced
  • 1 cup of corn kernels
  • 3 tablespoons butter, diced
  • 2/3 grated Parmesan cheese, divided
  • salt, pepper, onion & garlic powders
  • protein of choice

Layer zoodles, half of the butter, and 1/3 cup of the cheese. Next, layer tomatoes, corn, other half of butter, and remaining cheese. Add seasonings as desired. Cover lightly and microwave for about 5 minutes. Again, gently mix ingredients until the cheese and butter have created a sauce. It’s more of a faux alfredo, but it works with the lighter Summer fare. Top with your protein of choice. Honestly, it goes great with just about anything. Makes about 4-6 servings.

🍀 Happy St. Patrick’s Day!🍀