What’s On the Menu

Caramelized Red Onion Pizza

Summer Vacation is in full swing for my daughter!  Swimming lessons, gymnastics, Zumba classes.  And that’s just her!  Our evenings have been so busy that I’m either hitting the fast food places or making breakfast for dinner.  Not that there’s anything wrong with that!  But I haven’t had time to clean up my kitchen, either.  So now I’m at a stalemate.  Tonight I shall get my kitchen in order.  After all that hard work, though, who wants to make it all messy again??  So, I’m going to keep dinner easy and nearly effortless with my Caramelized Red Onion Pizza.


Caramelized Red Onion Pizza

  • 1 ball of pizza dough (store bought, homemade, premade, whatever)
  • 2 tablespoons olive oil
  • 1 large red onion
  • 1 tablespoon butter
  • ½ pint grape tomatoes
  • 2-3 tablespoons minced garlic
  • 15 or so basil leaves, torn
  • ¼ cup finely grated Parmesan cheese, the powdery-looking kind is my preference
  • flour, for dusting

Begin by slicing up your onion to your desired thickness.  I sliced mine thicker because I actually grilled it (so no butter necessary), but you can go thinner if you are sautéing in a pan with the butter.  While the onion is caramelizing, slice your grape tomatos into at least halves.  Add garlic and sauté until the tomatoes break down.  Once all elements are ready, remove from heat.

Sprinkle a little flour on a clean surface like a countertop.  With a rolling pin, roll out the pizza dough.  Flip over, sprinkle with flour, and roll out the other side.  Continue until you get your desired thickness.  For a crisper crust, go thinner.

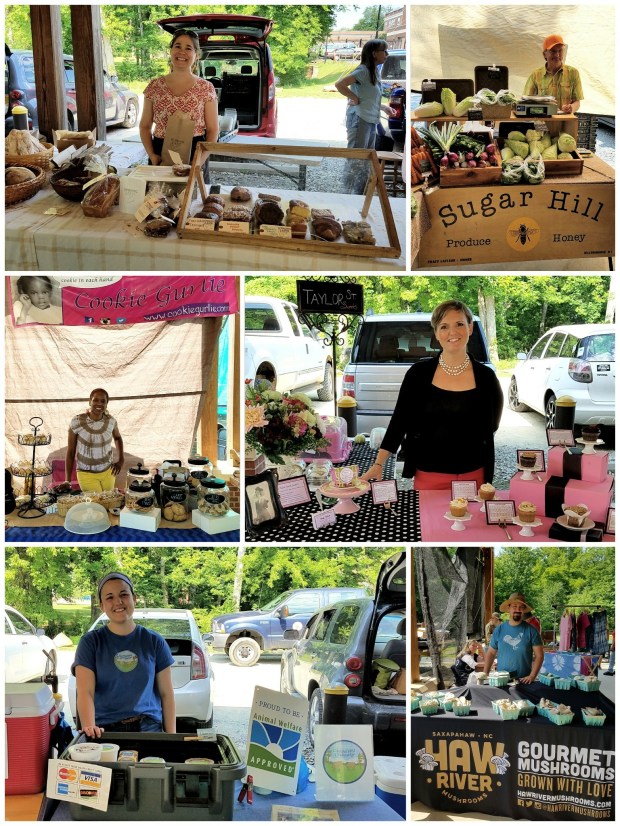
CONFESSION:  I’ve not yet attempted to make my own pizza dough.  Mine was purchased from an artisan local to me, the amazing Accidental Baker.  (Check them out online or on their Facebook page.)  I love supporting local and this stuff is top notch, exceptionally priced, and saves me a lot of time.  If you have a place nearby to get something as fresh as this, please do.  Or show off and make your own.  😉  The difference in taste is amazing.

Once you get it to the desired thickness, smear about 1 tablespoon of olive oil on each side of the dough – enough to lightly coat.  This will ensure extra crispiness and browning.  Smear the tomato/garlic mixture onto the dough.  Spread out the onions.  Top with the torn basil leaves and Parmesan cheese.

Pizza

A pizza stone works best, but this is not a requirement!  A foil lined baking sheet will work just fine, too.  In this instance, I was able to access a pizza stone and cook it on the grill.  It just made it a little more fun.

If baking, go for 350º for about 15-20 minutes or until pizza dough is getting golden brown on edges and center is firm.  (Time will vary depending on how thick you’ve rolled your dough.)

Pizza 2

Admittedly, the shape of my pizza was not Domino’s quality, but the taste was something they can’t hold a candle to!  Slice and serve.  Mangia!

Pizza 3


Late Night Munchies

It’s Summer!  (pretty much)  The kids are out of school and everyone is enjoying the fresh air and sunshine.  You know what that makes us??  HUNGRY!  All day, every day.  But you don’t want to spend the whole Summer snacking on junk food.  If nothing else, it makes you feel sluggish.  And you’ve got pools and beaches and mini golf to tackle!

I bring you a list of Late Night Munchies you can make that are healthier than their preserved cousins.  These are things you need to consider making at least one night in advance because they take time.  Picture this:  You’ve got a night with not much going on.  Pop these babies in the oven and just let them do their thing.  Slow and low is the key here.  You cannot rush them; they will either burn or be soggy.  Just let them cook and cool and enjoy the next day.  Or late at night, when those Summertime munchies really kick in.


Roasted Chick Peas

  • 1 can chick peas
  • olive oil spray
  • seasoning salt

Preheat oven to 225º and line a baking sheet with foil.  Gently rinse chick peas in colander and thoroughly drain.  Spread chick peas on paper towels to absorb extra moisture and pat dry.

Spread chick peas on foil and spray lightly with olive oil spray.  Season liberally with seasoning salt.  Bake for 2.5 hours.  I let them cool in the oven for an additional hour.  This ensures all the extra moisture will dry out.  You’ll be left with a nutty flavor that is crunchy on the outside and slightly soft on the inside.

These are best stored in a paper bag or left in an open bowl on the counter.  Plastic bags tend to make them lose their crunch.

Roasted Chick Peas 1

Sweet Potato Chips

  • 1 large sweet potato
  • olive oil spray
  • seasoning salt
  • mandolin ***This is key.  You absolutely need a mandolin to create even, thin slices.  For sweet potatoes, I used a 1.5mm guard.***
  • parchment paper or silicon baking pad

Preheat oven to 225º.  Spread out sliced potato onto parchment paper or on silicone baking pad.  Spray lightly with olive oil, then moderately sprinkle with seasoning salt.  The potato slices will shrink considerably, but I find that they need a little more salt than the zucchini chips.

Bake for 2.5 hours.  As with the chick peas, I found my best results in letting them cool in the oven so as to get them crispy.

Sweet Potato Chips 1

Zucchini Chips

  • 1 large zucchini
  • olive oil spray
  • seasoning salt
  • mandolin ***This is key.  You absolutely need a mandolin to create even, thin slices.  For zucchini, I used a 2.5mm guard.***
  • parchment paper or silicon baking pad

Preheat oven to 225º.  Spread out sliced zucchini onto paper towels.  Top with paper towels and press down firmly to soak up as much extra liquid as possible.  Spread slices on parchment paper or on silicone baking pad.  Spray lightly with olive oil, then sprinkle with seasoning salt.  The zucchini slices will shrink considerably, so go easy on the salt.  You can always add more later.

Bake for 2-2.5 hours.  As with the other two, I found my best results in letting them cool in the oven so as to get them crispy.

Zucchini Chips

The Farmers Market

On Saturday, I visited my local Farmers Market.  I’ve never liked getting up early on Saturdays, as it’s usually my only day to sleep in, but for the past couple of months I’ve been sucking it up and going.  The crazy thing is I LOVE IT!  I’ve gotten to know so many of the vendors and farmers and I always buy more than I think I will.  I truly enjoy supporting my own little community.  These are real people!  They are the farmers and bakers and dish washers and sales people for their own goodies.  Not some big store with no face, no real knowledge of their product.  If you have a Farmers Market near you, I encourage you to go check it out.  Talk to the people, learn about them, and put an actual face with the name directly connected to the food you are eating.  It’ll change the way you think and eat!

PicsArt_06-11-07.03.36
***Special thanks to Strong Arm Baking Company, Sugar Hill ProduceCookie Gurlie, Taylor Street Sweets, Chapel Hill Creamery, and Haw River Mushrooms for letting me take their pics.

Red, White, & Blueberry Cobbler

Memorial Day weekend.  Sure, it’s a lot of fun, but it’s about so much more than just a backyard barbeque.  In the next day or two, we will get together with friends and family to celebrate those who protect our country, those serving, and those fallen.  Our nation has seen better days and worse, yet here we still stand, free because of the brave.  I am humbled by their sacrifices every day of my life.

In honor of the day – and because we will indeed go to a cookout, after all – I am sharing a fun and patriotic recipe that I always enjoy presenting at get togethers.  It serves many with little effort, so I can easily prepare it the day of, and it’s always an attractive crowd-pleaser.

Red, White, & Blueberry Cobbler

  • 5 cups blueberries, divided 4 & 1
  • 1 cup sugar, divided
  • 1/4 cup water, if needed
  • 8 tablespoons butter
  • 1½ cups self-rising flour
  • 1½ cups milk
  • cinnamon or ginger, optional
  • 1-2 pints strawberries
  • Whipped Cream, recipe below, (or Cool Whip)

Preheat your oven to 350º.  Combine 4 cups of the blueberries with ½ cup of sugar, mixing well.  Simmer for about 10 minutes.  You want some syrup, and blueberries usually produce a good amount.  If they get too thick, slowly mix in the water then remove from heat.

Put the butter in a baking dish and place in oven to melt.

Mix the remaining ½ cup of sugar, flour, and milk slowly, avoiding clumps.  Pour the mixture over the melted butter, but do not stir.  Carefully spoon the fruit on top then gently pour in syrup.  If you’re using the cinnamon or ginger, sprinkle this on top.  Place back in oven.

Batter will rise during baking, about 30-45 minutes or until golden brown on top.  Allow cobbler to completely cool, about 1-2 hours.  Meanwhile, slice tops off strawberries and make whipped cream (if not using Cool Whip).

Honey Spiced Whipped Cream

  • 1 cup heavy cream
  • 2 tablespoons honey
  • 1 teaspoon cinnamon

Combine all ingredients in bowl and mix with electric mixer until stiff peaks form.  Keep in refrigerator until ready to use.

Once cobbler is completely cool to the touch on top, arrange fruit and whipped cream in a flag pattern.  To create the whipped cream “stars,” I used an icing gun.  You can also just use a spoon and create small dollops.

Red White Blueberry Cobbler

Enjoy your Memorial Day.  Eat good food, play in the pool, laugh and talk and toast with friends and family.  But most importantly, remember those who are without theirs so that you can be with yours.  

Dairyland Farmers with Strawberry Balsamic Reduction (An Adult Dessert)

For Mother’s Day last Sunday, I made a scrumptious breakfast for a couple of the moms in my life.  I had a variety of bagels with cream cheese, fresh strawberries, thickcut hardwood smoked bacon, coffee with fun creamers, fresh squeezed mimosas, and another fun addition: Dairyland Farmers with Strawberry Balsamic Reduction.

Mother's Day Breakfast

Not everything I post will be my own recipe or creation.  As the saying goes, “If it ain’t broke, don’t fix it,” and sometimes you just roll with the wheel that’s already been invented.  In this case, it’s a wheel of cheese…

Lately, I’ve been visiting our local farmer’s market to peruse their goodies.  One of my favorite vendors is Chapel Hill Creamery, out of Chapel Hill, NC.  They sell an amazing selection of cheeses (as well as pork and beef), and my latest craving has been for their Dairyland Farmers Cheese.  As described on their websitethis cheese is made with pasteurized milk and is a fresh, moist cheese with a clean, vibrant flavor and tangy hint of citrus.

At their booth, they had the balsamic reduction recipe printed out for this cheese.  It said something about “An Adult Dessert.”  Ummm, okay!  So, I made it for Mother’s Day.  It was such an instant hit that I shared my success on Chapel Hill Creamery’s Facebook page and they were thrilled to get the great feedback.

If you’re local, I highly recommend checking out this farm’s amazing products.  If you’re not, you can find Farmer’s Cheese blends in many fun stores like Trader Joe’s, Whole Foods, Wegman’s, etc.  Then you, too, can whip up a tasty treat for the special people in your own life…or just for yourself!

Dairyland Farmers with Strawberry Balsamic Reduction

Breakfast Smoothie

If you follow my Facebook page, (shameless plug), you may recall that last week’s TIPsy Tuesday spotlighted ground oats in place of flour or breading.  (You can also find TIPsy Tuesday in The Snack Pack on this site.)  In light of that, I wanted to share a breakfast smoothie recipe I make that uses ground oatmeal in place of protein powder.  This is such a great alternative!  Filling, healthy, and less expensive.  Breakfast.  Boom.


Breakfast Smoothie

  • 1½ cups almond or coconut milk
  • ½ banana
  • 1 cup spinach
  • 1 tablespoon creamy peanut butter
  • ¼ cup old fashioned oats, uncooked
  • 1 teaspoon dark chocolate powder, unsweetened
  • 1-2 tablespoons instant coffee
  • 1 teaspoon agave, optional

Breakfast Smoothie

Put all ingredients in blender and blend on medium until banana and spinach are fully chopped and blended.  Blend on high for 1-2 minutes longer, to ensure oats and spinach are fully blended in.  If you are a major textural person, you may consider grinding oats into a powder in a spice grinder or food processor first, then adding to blender ingredients.  I personally find that the blender does a good enough job after being on high.  Pour over ice and get started on your day!

I have also made a smaller version of this without the banana as a “snack” drink after a workout.  Curbs that craving for something sweet and the feeling of being starved.  Cheers!

Strawberry Vinaigrette

I know how it goes.  You made some of those Strawberry & Chevre Two-Bites for dessert after that Sweet Sausage & Feta Polenta that you devoured for dinner.  Suddenly, it’s Thursday and you’re thinking that healthy eating has officially flown out the window.  But every day is a new day, a fresh start, a day to embrace what we have versus what we think we need.  And what do we have?  A lot of strawberries.  Still.  So, it’s not too late…


Strawberry Vinaigrette

  • 1/3 cup balsamic vinegar
  • 1 cup whole fresh strawberries
  • ¼ cup olive oil
  • 1 teaspoon agave
  • splash of lemon juice

Combo

Extra tip: Get an Italian dressing kit with the bottle from the grocery store (Good Seasons, etc.).  The bottles are so pretty and you can keep them for more of your own homemade dressings!

Put all of the ingredients in a food processor and blend away until as smooth as possible.  This recipe also works great with blueberries instead, which are not only tasty, but chock full of antioxidants!

Strawberry Vinaigrette

I put this on a fantastic salad made with the following goodies that go unexpectedly well together:

  • romaine or spinach or arugula (or all three)
  • strawberries
  • radishes
  • cucumber
  • almonds, walnuts, or peanuts
  • shredded Parmesan cheese
Strawberry Salad
Sadly, I was out of shredded Parmesan cheese this day, but I always put it on this salad and it adds a great bite of flavor!

Take back your week one day at a time and make a unique and beautiful salad that will have others looking longingly over your shoulder, I promise!

Strawberry & Chevre Two-Bites

Strawberry season is in high gear and I’ve got strawberries coming out of my ears!  Gee, what a terrible problem to have, haha.  I’ve been getting creative with mine, and recently put together a little dessert that has become a big winner!  The distinct flavors come together so nicely and really pop, plus it’s a great dinner party get together item.  Sweet indeed!


Strawberry & Chevre Two-Bites

  • Strawberry Chevre, or other such sweet flavor 
  • fresh strawberries, sliced
  • fresh tangerines, sliced
  • mint leaves, cut in half length-wise
  • graham crackers
  • ginger, optional
  • cinnamon, optional

Break apart your graham crackers and spread a liberal amount of the chevre on them.  Top with the fruit and mint, alternating.  If desired, sprinkle with a little ground ginger or cinnamon.

For the dessert pictured below, I used Cranberry Orange Chevre and tangerines.  As for the cheese, you can also use strawberry, peach, honey fig, or any other fruit/dessert flavor.  Top with your fruit of choice, preferably those that match the flavors (strawberries with strawberry, etc.) and one other that will give some contrast.  Have fun getting creative and enjoy!

Strawberry n Chevre Two Bites

Spring Onion & Mushroom Bisque

Some days you take shortcuts, then some days you just hit on something that knocks it totally out of the park.  This happened to me last week.  I got up super early and hit my local farmers’ market.  Now, I have a black thumb.  I mean, I’ve killed cactus.  That’s talent.  But on this day I was feeling froggy and I bought a mushroom log.  They were just so cool looking!  The idea was that you could grow your own oyster mushrooms, getting about 3-4 fruits out of this one log of pressed wood and such.  I was with a friend and we were both stoked.  Super cool project for us and our kids.  Plus yummy mushrooms.  Yay.

Our logs were already started for us and there was a small batch of mushrooms that had already sprouted.  We gave it another week and it was time!  I harvested about 3 cups of rough chopped oyster mushrooms.  I was excited!  This was the coolest thing ever!

Mushroom Log

I had some other mushrooms on hand, so I knew right then: I was making soup of some sort.  But it’s Springtime.  What to do?  And that’s when it hit me:  A Spring-inspired mushroom bisque.

Spring Onion & Mushroom Bisque

  • 3 tablespoons olive oil
  • 2 cups chicken broth
  • 1 cup moscato or sherry
  • 4 tablespoons lemon thyme
  • 2 large spring onions, bulbs and white stem only, diced
  • 6 cups oyster mushrooms, roughly chopped
  • 1 tablespoon butter
  • 1 tablespoon flour
  • 1/2-3/4 ounce Swiss cheese  (For reference, I just used a single slice of medium-sliced Swiss.)
  • 1 cup milk
  • salt, pepper, onion powder, garlic powder

Spring Onions n Mushrooms

Heat olive oil and sauté onions until translucent.  Add mushrooms and let them sweat out and soften, about 10 minutes.  Season with salt and pepper, and lightly season with onion and garlic powders.

Add chicken broth and stir in lemon thyme.  Simmer for about 15 minutes.

Mushrooms n Lemon Thyme

Meanwhile, create Swiss cheese roux by slowly melting the butter in a separate pot on medium-low heat.  Whisk in the flour and milk, then add the cheese and continue to whisk until fully combined and thickened.  Be careful not to let it boil, as it will separate.

Once roux is thickened to a good cheesy consistency, slowly stir into mushroom / broth mixture until thoroughly combined.  Keep on medium-low heat for an additional 10-15 minutes for flavors to meld.  After that, if soup is still too watery, slowly add in a little extra flour, about 1 teaspoon at a time, and whisk in thoroughly.  Wait another 5 minutes and see how consistency is.

Top with extra thyme leaves and serve!  Bonus:  grab some crusty bread to sop up the goodness, too!

Spring Onion Mushroom BisqueSpring Onion Mushroom Bisque 2This was truly an amazingly flavorful dish.  I served it along with grilled steak and garlic bread and my husband and I devoured it.  Even my 6 year old daughter – who is not a fan of mushrooms – loved the brothy bisque part.  This is a dish that truly reflects the love you put into it!  Enjoy every moment!

All good things must come to an end though, as my reputation holds true.  My log has since gotten a little brown along the edges and it seems I’ve broken it, haha.  We’ll see if it ever fruits again, but if not, I’ll just have to buy some more mushrooms because this is definitely a dish I will make again!

Smashed Turnips & Turnip Greens

Weeknights can be hectic, so I take as many shortcuts and quick fixes as I can when it comes to meal time.  In my house, turnip greens and smashed turnips are a hit.  Not only are they delicious and nutritious, but they are a One Stop Shop when it comes to side dishes…which makes that hit a homerun!


Smashed Turnip & Turnip Greens

  • 2 bunches of turnips, greens still attached
  • 1-1½ cups grated sharp cheddar cheese
  • ¼ cup milk, or until right consistency
  • 2 tablespoons olive oil
  • salt, pepper, onion powder, garlic powder, to taste
  • splash of vinegar, optional

Turnips with Greens

Cut the greens off of the turnip roots.  Set aside for later.  Peel the turnips, then dice.  In a pot of salted water, boil the turnips until soft.  Drain, then return to pot.  Add milk, cheese, salt, and pepper.  With a potato masher or large fork, smash the turnips until well blended and mostly smooth.  There will still be some smaller chunks, but that’s okay.

In a sauté pan, heat olive oil.  Rinse and rough chop the turnip green leaves 1-2 inches from the root end.  Throw away those last pieces.  With the remaining greens, you can trim the stems away or leave them intact; it’s up to you.  Sauté with salt, pepper, garlic and onion powders until soft.  If the greens get too dry and hot, you can add a little water to the pan.  When they are completely softened, you can add the vinegar of your choice.  Sometimes I use balsamic, sometimes apple cider.  It just depends on your preference.

And just like that, you’ve got two side dishes that pair beautifully with anything from a hunk of steak to some fried chicken.  And you can still get the kids into bed on time.  😉

One Stop Sides

Pesto Green Beans

Old habits are hard to break, and the same holds true when you’re cooking.  We tend to make the same things the same way.  Every.  Single.  Time.  Break the cycle with an easy to come by staple item: the good ol’ green bean.  Fresh green beans are relatively inexpensive.  You can get a lot for a little, so you can easily feed the masses with them.  But I get tired of boring steamed beans, so when I stumbled across this tasty new way to prepare them, I was hooked!  Plus now I have another great side dish / picnic / cookout item to add to my repertoire. Who says you can’t teach an old dog new tricks??


Pesto Green Beans

  • 5 garlic cloves
  • 3 tablespoons pine nuts or walnuts
  • 3 cups basil leaves
  • 2/3 cup Parmesan cheese
  • 2 tablespoons butter
  • 1/2 cup olive oil
  • salt & pepper, to taste

Place all ingredients into a food processor, adding the olive oil last.  Blend until smooth.

  • 2 pounds green beans
  • 2 teaspoons Parmesan cheese
  • 2 teaspoons pine nuts or walnuts, rough chopped
  • drizzle of olive oil
  • salt & pepper, to taste

Steam or boil green beans for about 5-10 minutes or until tender.  Drain, then toss with pesto, adding salt and pepper to taste.  Top with additional cheese and pine nuts, then drizzle with olive oil.  Voila!

Pesto Green Beans
For this particular occasion, I used walnuts.  I found it to be just as good as the pine nuts, plus less expensive!  Win/win!  🙂

Cucumber Salad

It’s starting to get a little warmer and I was more excited than I care to admit to make cucumber salad the other night.  I love cucumbers.  They really do seem to cool you off when the temps rise.  This salad is a tasty little side to any lunch or dinner.  I served ours up with a nice big BLT.  Nom nom nom.  It makes an excellent dish for a cookout, family reunion, or picnic.  Basically, any outdoor get together will welcome this little number… even if that’s just enjoying dinner on your back porch.


Cucumber Salad

  • 2 cucumbers, diced
  • 1 medium red tomato, diced
  • 1 medium yellow tomato, diced
  • 1 spring onion bulb, finely chopped
  • 4 tablespoon balsamic vinegar
  • 2 tablespoons olive oil
  • 1 teaspoon lemon juice
  • salt, pepper, onion powder, garlic powder, all to taste

Okay, you ready for this?  You sure?  Combine all ingredients in a bowl and mix it together.  Boom.  You’re done.  Now on to your next adventure!

Cucumber Salad